You can create a new Project from scratch, or you can use a Project template. See Creating a Project using a template for more information about templates.
|
1
|
|
–
|
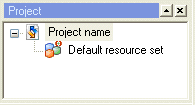
Project name – The name of the Project.
|
|
–
|
Default code page – The default code page you specify here will be the default code page in all code page drop-down lists in the Project.
|
|
–
|
Default Resource set – The default resource set of the Project. This resource set is automatically connected to all Platforms, Message configurations, and Runtime configurations you create from within the Project.
|
|
–
|
Project folder/directory – The path to the Project directory. The Design Center Project files created from within the Project are stored in this directory.
|
|
–
|
Repository connections – Optionally, click to select the connection profile to be used when accessing a Media Management repository. See Importing an image from an OpenText Media Management repository.
|
|
3
|

